How to Spray Kitchen Cabinets White
Matt is a professional painter and freelance writer, sharing his knowledge, house-painting tips, and product reviews.
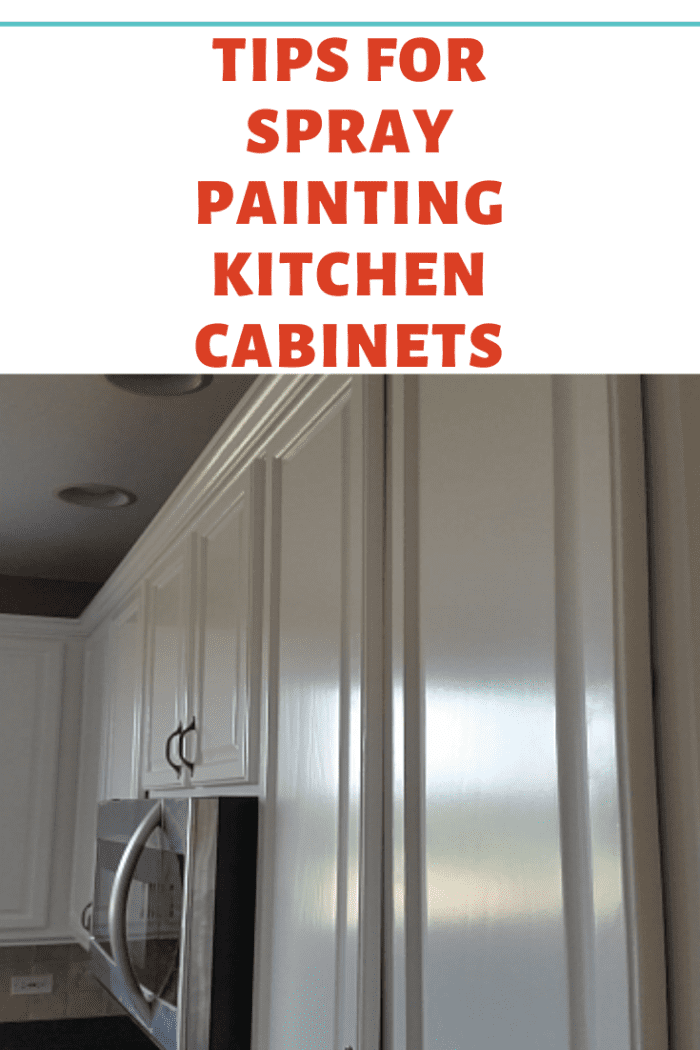
Spray Painting Kitchen Cabinets
If you're happy with everything about your cabinets except the color, spray painting them is the best alternative to buying new ones. New cabinets are expensive and are sometimes constructed with cheap materials, like particle board. Most of the older cabinets I paint are well-built and only need a paint job to modernize them.
Why do I need to mask (tape) to prepare the surfaces?
Spray painting kitchen cabinets produces over-spray, which means you must carefully mask everything to avoid making a mess. Some painters argue that the amount of time spent masking and spraying a kitchen ends up taking the same amount of time as brushing and rolling, but that definitely isn't the case in my experience.
How much time will spraying save?
I can mask a kitchen for spraying in no more than one day. When the masking is done, I can spray the primer and paint in about ten minutes per coat. Doing this process with a roller would take close to one full day of work for each coat, so using a sprayer saves me a couple of days of work.
Step 1: Remove the Doors and Drawers
Take down the doors and drawer fronts to spray them.
After removing the hinges and knobs, I label the reverse side of each door, underneath a hinge, so I know where each door goes during installation at the end of the job. Stick a piece of tape over the number.
You can remove the whole entire drawer itself too, including the track, but I usually only remove the drawer fronts, inserting tape over the space around each drawer to keep over-spray from blowing in.
Step 2: Mask (Tape) All Edges and Boundaries
Masking is a lot of work, but using the right masking tools and supplies saves a lot of time. The first must-have tool you need for masking is the 3M hand masker and the masking film to go with it, as well as painter's tape.
I use the 3M masking tool for all of my paint prep, including cabinet painting. The tool allows you to easily mask by sticking your masking tape and plastic to the surface at the same time, instead of having to do this separately. A masker saves tons of time, especially for big jobs.
Protect Your Floors by Taping Red Rosin Paper Down
Cover the kitchen floors with red rosin paper instead of drop cloths. Drop cloths blow around from the pressure of the spray gun. You can buy three-foot rolls of red rosin paper at practically any home improvement store. I tape the paper to the floor right up to the bottom of the base cabinets.
Wrap and Tape Appliances
Appliances should be wrapped with plastic, taping around the edges to prevent over-spray from blowing underneath. The dishwasher is where you have to be careful. I open the dishwasher and run tape along the sides of the door to keep it clean.
Wrap and Tape Light Fixtures and Tops of Cabinets
Low-hanging lights can be covered with plastic. If your upper cabinets are close to the ceiling, tape masking paper along the top to block the over-spray. The cabinet wall box openings are the most time consuming to tape, but easy with the masker I mentioned. What I do is run tape and plastic right behind the small style that goes around each cabinet opening, using the masker. This allows that small piece behind the doors to be sprayed without blasting the inside of the cabinet boxes with paint.
Step 3: Prep the Surfaces (Clean, Sand, and Dust)
I won't go into too much detail about surface preparation since this article is mostly about spray painting kitchen cabinets, not prep, but make sure everything has been prepped before priming and painting. Drill holes for new knobs at this stage too, not after painting. If you need to fill old holes that won't be used anymore, Bondo wood filler works great.
All wood surfaces should be cleaned, sanded, primed, and painted, sanding in between every coat. Denatured alcohol is a good cleaner that cuts right through grease. I apply two coats of BIN shellac primer and two coats of Emerald urethane for my cabinet projects. If you're working with grainy cabinets, you can also use grain filler to smooth out the surface if desired.
It's also important to use a damp rag, or a tack cloth, to remove sanding dust before spraying. Dust removal should be done before spraying each coat. Dust is your enemy when spraying.
Read More From Dengarden
Step 4: Apply the Spray Spray Paint to the Cabinet Doors
I use my Graco 495 airless sprayer for all of my cabinet spraying, but a smaller airless is fine too. An airless sprayer is faster than an HVLP sprayer and doesn't require thinning of the paint like an HVLP does. With the right spray tips and paint, you can get an awesome finish using an airless sprayer.
I use the RAC X tip guard, equipped with the Graco FFLP (fine finish, low pressure) tips to spray cabinets. Specifically, size 210 and 310 both work well for cabinet painting. The size 310 works great for spraying the doors, or the 210, but I like the four-inch spray fan of the 210 for shooting the framing on the fronts of cabinet wall boxes. The six-inch spray fan of a 310 makes the door spraying go faster.
Methods for Spray Painting Cabinet Doors:
- Cabinet Drying Rack: If you're painting more than one set of cabinets, investing in a good drying rack is a must; otherwise you're going to waste a lot of unnecessary time. The rack system I use for all of my cabinet jobs is the Door Rack Painter. The doors are sprayed and stored flat. The unique design of this rack set-up allows both sides of the doors to be sprayed at once, in the same day, instead of waiting for one side to dry to paint the other side. This rack system has been incredibly useful and time-saving for my painting business. I highly recommend it.
- Hang the Doors: Another method that works well is to drill small pilot holes into the door edge, attach swiveling clothes hanger hooks, and hang the doors for spraying. You can hang the doors from a PVC pipe fastened to the top of two step ladders. The main downside to spraying doors this way is, due to gravity, the paint is more likely to sag if you spray too heavy. I always spray doors flat to avoid sagging, but the clothes hanger method works, and you can buy swiveling hangers anywhere for cheap. When drilling the holes, the holes are drilled into the edge of the door that will never be seen when they're installed. For example, holes on the bottom edge of a base cabinet door, or on the top of an upper door, won't be visible after the doors are hung. The holes can be filled too.
- Saw Horse Setup: The most common way people spray paint and store cabinet doors is using a sawhorse, or boards, but this is the slowest method of the three. Doing the work this way, you would spray one side, wait for the paint to dry, and flip the door over when it dries to paint the other side. This works fine if you don't care about the extra time involved and you don't want to buy a drying rack. Using this method though, there's usually an extra three days of work involved, waiting for the paint to dry. Another problem is that the pressure between the board and the fresh paint can cause marring from lying flat.
Spraying the Cabinets
Spraying is a skill that takes time to learn and get used to, but it isn't hard. I recommend practicing on cardboard before pulling the trigger on your cabinets. I always spray two coats of primer and two coats of paint, sanding in between each coat. It's important to not only use a leveling paint for cabinets but to also follow the re-coat times, allowing the coating to dry before shooting the next coat.
You can spray the doors without a spray booth but always wear a respirator, especially indoors. Set up a couple of box fans to filter dust particles away from the spray area. There are also portable spray tents that make it easier to spray inside a garage without bombing everything with over-spray.
This article is accurate and true to the best of the author's knowledge. Content is for informational or entertainment purposes only and does not substitute for personal counsel or professional advice in business, financial, legal, or technical matters.
Questions & Answers
Question: Do you thin the emerald paint before spraying it with a 210 tip?
Answer: Yes, I add a small amount of water, using a cap from a plastic water bottle. I fill the cap two times and pour it in. The water helps the enamel lay out over the surface better. Emerald urethane is a little tricky to spray at first until you get a feel for how the product performs. If you spray cabinet doors laying flat, which I recommend, you have to build up the coats as you spray. Start with one light coat, moving the spray gun fast, then make two more passes, moving the gun slower to build up the coating. With Emerald urethane, you have to spray a thick and even coating. When spraying doors horizontally, Emerald levels out really nice if you spray on the right thickness. If you spray it too light, you'll get an orange peel effect, or rough textured look with small air bubbles. I definitely recommend practicing on some spare pieces of wood first.
Question: I am spraying Emerald Ureth/semi-gloss, 310 fflp tip, and I cannot seem to avoid microbubbles/orange peel? What have you found to be the best temperature/pressure?
Answer: Emerald enamel is a little tricky to spray. It's thick and forms those little pin hole bubbles when you don't spray it on heavy enough on the second coat. I'm not sure if those are the micro bubbles you're referring to. To avoid orange peel, try increasing your pressure between 1,500 to 2,000 PSI and move fast with the gun. You'll get orange peel if you spray it too heavy and too close to the surface. If you spray at a low pressure too it doesn't atomize the enamel enough to lay it on smooth. That will result in too much paint on the surface. Don't hold the spray gun too close to the surface. Maybe add some extender to help the enamel lay out better. If the micro bubbles problem you mentioned were bubbles that formed later as the enamel dried, I've had this same problem more than once and stopped using this product as a result. Sherwin Williams reformulated this product and the new version is unpredictable for spraying. The original version sprayed fine. Altering temp and coating thickness made no difference. I went back to spraying Pro Classic and never have any issues with that product. It's also easier to spray. I would actually recommend just using Pro Classic acrylic and bypass the micro bubbles frustration.
Question: How can I remove scratches from sanding between my spray coats of Advance? I used 220 then 400 grit.
Answer: Fine grit sanding sponges work the best for me when sanding in between coats of primer and paint. Regular sandpaper sheets seem to scratch the surface more for some reason. You didn't mention which one you used to sand the paint. If the surface is totally scratched and too far gone, you might have to use a random orbit sander to sand off the top layer to remove the scratches and start over. You can also try using fine-grit sanding sponges with a little more pressure.
Question: What is Solo Paint?
Answer: Solo is a Sherwin Williams trim paint only available in certain parts of the United States. My local SW store doesn't stock Solo.
© 2018 Matt G.
Matt G. (author) from United States on August 21, 2018:
Thanks. I'm glad you found it helpful.
Travel Chef from Manila on August 21, 2018:
I really do not have any idea on how to do paint anything at my home because I am not quite confident about how I can come up with an evenly painted surface. I think this guides can help me learn something.
How to Spray Kitchen Cabinets White
Source: https://dengarden.com/home-improvement/Tips-for-Spray-Painting-Kitchen-Cabinets
0 Response to "How to Spray Kitchen Cabinets White"
Post a Comment